0 前言
python 虚拟环境的重要性已经无需多言了, 目前所有支持 python 虚拟环境的工具中最好用的应该就是 conda 了, 最重要的一点是可以一键创建不同版本的 python 环境以适应不同的需求.
Anaconda 比较臃肿, 本文使用无 GUI 的 miniconda.
环境:
- win10
- miniconda3-py11-23.5.2-0
1 安装
安装前需要确认一下系统及用户的环境变量中不要存在中文, 在 CMD 中直接执行 path 或者 git-bash 中执行 echo $PATH 进行确认, 这个问题当时被折磨疯了, 还给 conda 项目提了 issue.
选好路径直接下一步即可, 没有需要注意的自定义配置项
2 配置
2.1 环境变量
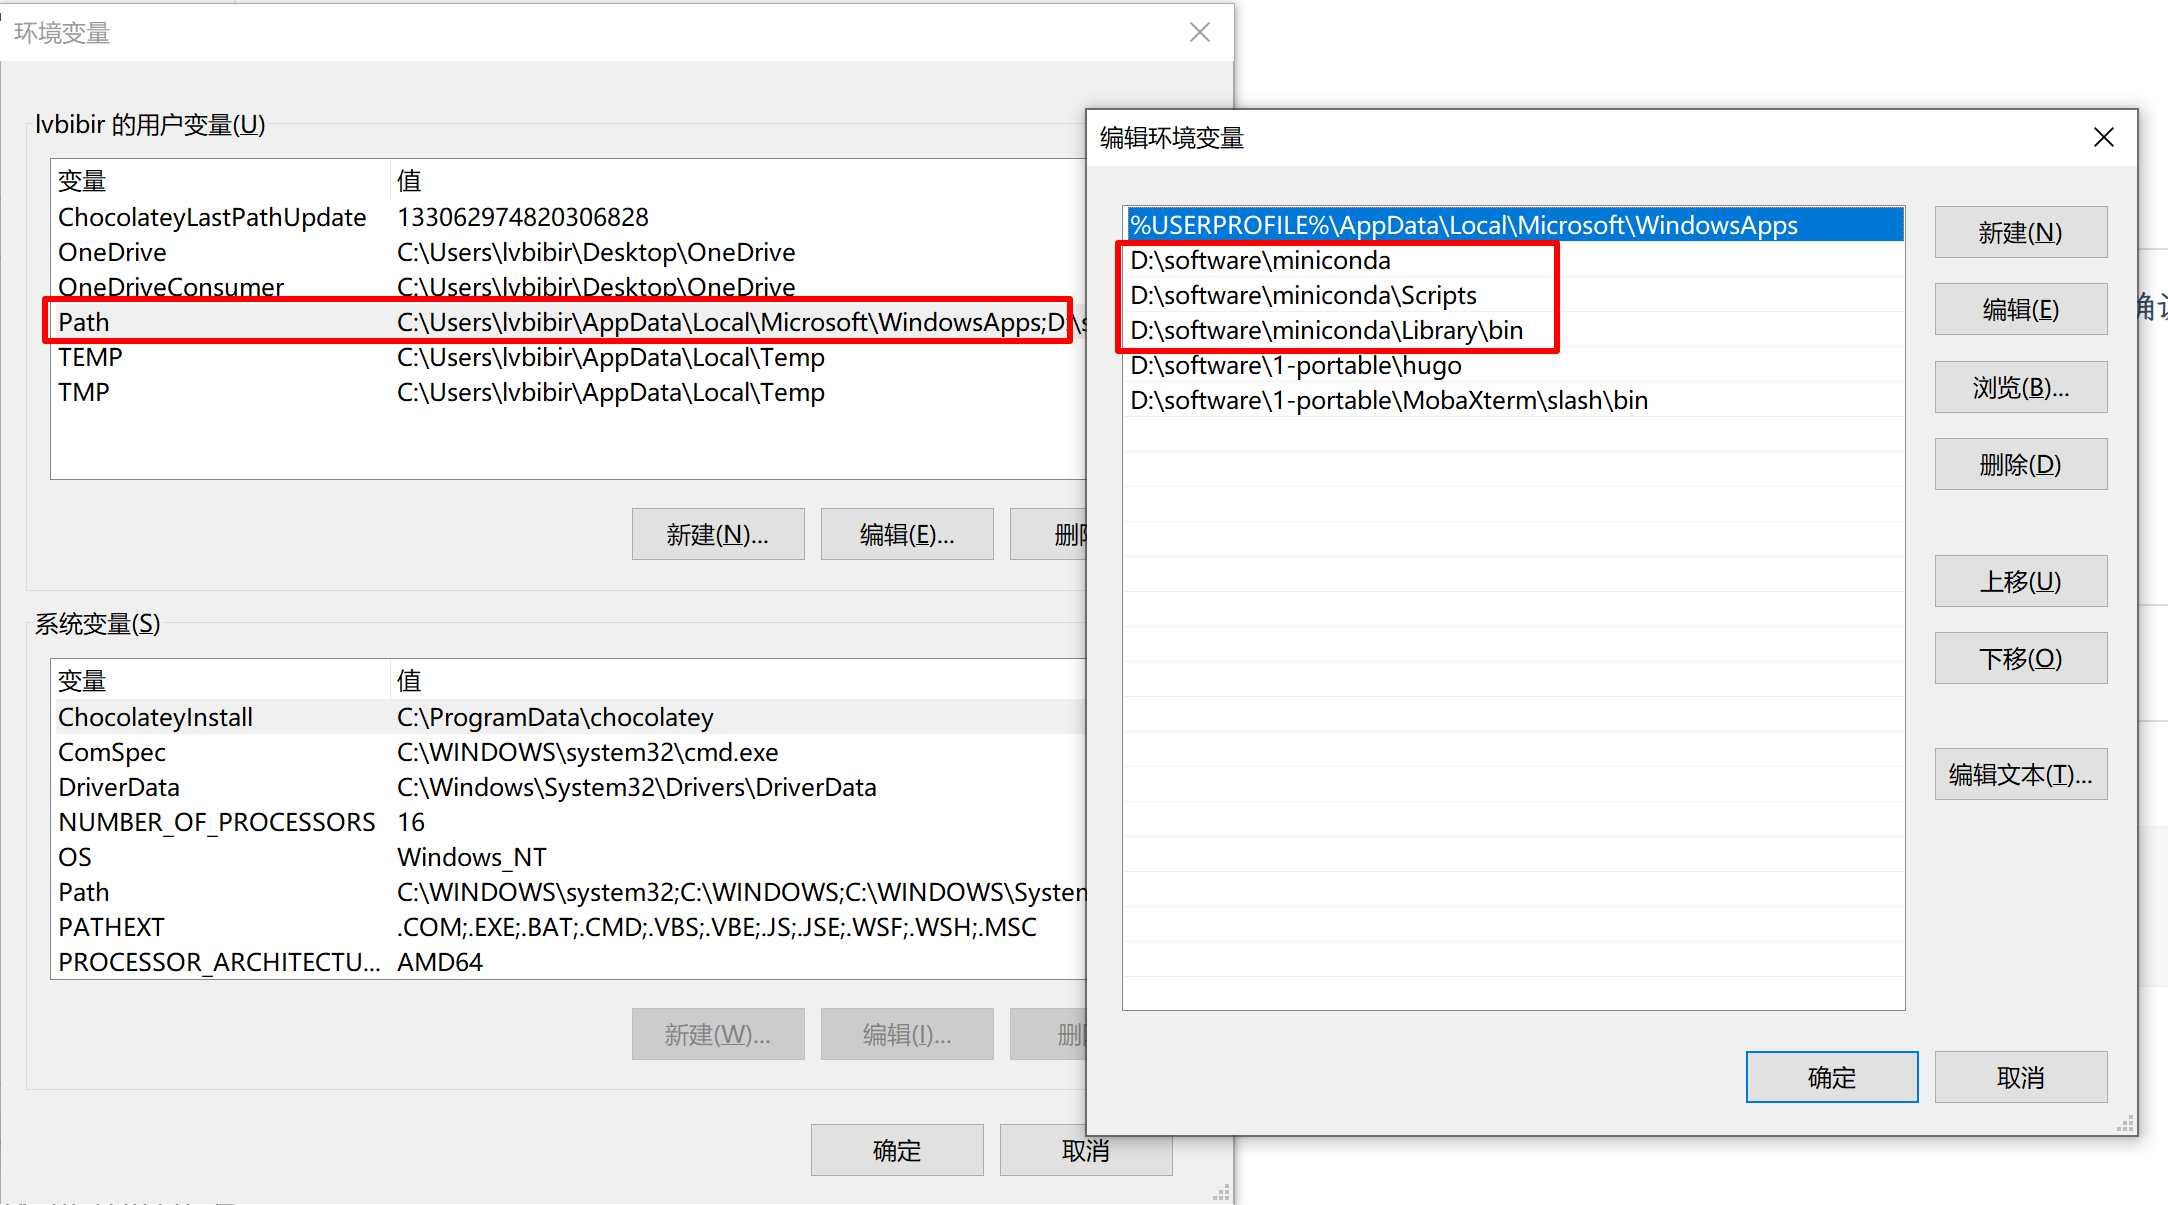
在用户环境变量 PATH 添加如下项, 我的安装路径是 D:\miniconda, 按实际情况修改
D:\software\miniconda
D:\software\miniconda\Scripts
D:\software\miniconda\Library\bin
添加完后重启系统, 让系统重新读取一下环境变量
2.2 conda 配置
miniconda 默认没有 .condarc 配置文件, 需要生成一下
conda config --set show_channel_urls yes
.condarc 会生成到用户目录下
$ cat .condarc
channels:
  - defaults
show_channel_urls: true
default_channels:
  - https://mirrors.tuna.tsinghua.edu.cn/anaconda/pkgs/main
  - https://mirrors.tuna.tsinghua.edu.cn/anaconda/pkgs/r
  - https://mirrors.tuna.tsinghua.edu.cn/anaconda/pkgs/msys2
custom_channels:
  conda-forge: https://mirrors.tuna.tsinghua.edu.cn/anaconda/cloud
  msys2: https://mirrors.tuna.tsinghua.edu.cn/anaconda/cloud
  bioconda: https://mirrors.tuna.tsinghua.edu.cn/anaconda/cloud
  menpo: https://mirrors.tuna.tsinghua.edu.cn/anaconda/cloud
  pytorch: https://mirrors.tuna.tsinghua.edu.cn/anaconda/cloud
  pytorch-lts: https://mirrors.tuna.tsinghua.edu.cn/anaconda/cloud
  simpleitk: https://mirrors.tuna.tsinghua.edu.cn/anaconda/cloud
  deepmodeling: https://mirrors.tuna.tsinghua.edu.cn/anaconda/cloud/
# 不自动激活 base 环境
auto_activate_base: false
# 虚拟环境存放路径
envs_dirs:
  - D:\software\python\envs
# pkg 存放路径
pkgs_dirs:
  - D:\software\python\pkgs
上述配置文件中主要配置了三项: conda 的清华国内源, 虚拟环境和 pkg 的存储路径
如不配置创建虚拟环境时可能会生成到用户目录下, 导致系统盘臃肿, 建议新建一个目录专门存放
2.3 pip 配置
系统中直接安装的 python, 其 pip 的配置文件一般存放在用户目录的 .pip/pip.ini, 使用 conda 创建的虚拟环境的 pip 则不同, 可以使用如下命令查看, 这个问题当时也折磨了我很久
$ pip -v config list
For variant 'global', will try loading 'C:\ProgramData\pip\pip.ini'
For variant 'user', will try loading 'C:\Users\lvbibir\pip\pip.ini'
For variant 'user', will try loading 'C:\Users\lvbibir\AppData\Roaming\pip\pip.ini'
For variant 'site', will try loading 'D:\software\miniconda\pip.ini'
这里我们使用用户目录存放配置文件, 默认也是没有的
$ cat pip/pip.ini
[global]
timeout = 6000
index-url = http://pypi.tuna.tsinghua.edu.cn/simple
trusted-host = pypi.tuna.tsinghua.edu.cn
proxy=http://127.0.0.1:7890
配置 pip 使用国内的清华源, 最后一条 proxy 可以不写, 这个问题是因为我常开代理, pip 默认用 https 访问系统代理, 导致 pip 报错.
2.4 管理虚拟环境
上述步骤做完后就可以正式使用 conda 创建虚拟环境了
用管理员打开 powershell 使用如下命令初始化 conda
conda init powershell
conda init cmd
conda init bash
之后重新打开终端, 创建你的虚拟环境, -n 表示虚拟环境的名字, 不指定 python 版本默认最新
conda create -n py37 python=3.7
激活虚拟环境
conda activate py37
退出虚拟环境
conda deactivate
查看虚拟环境列表
conda env list
删除虚拟环境
conda env remove -n py37 --all
3 其他
conda 最为人诟病的点应该是包管理跟 pip 可能会产生一些冲突, conda 官方给出的最佳方案是
- 全程使用
conda install来安装模块, 实在不行再用pip - 使用 conda 创建完虚拟环境后, 一直用
pip来管理模块- pip 应使用
–upgrade-strategy only-if-needed参数运行, 以防止通过 conda 安装的软件包进行不必要的升级. 这是运行 pip 时的默认设置, 不应更改 - 不要将 pip 与
–user参数一起使用,避免所有用户安装
- pip 应使用
总结一下就是不要来回地用 pip 和 conda, 专一一点 (笑
以上